Ever wondered how well your HVAC system is working in your home or condo? I did to an unhealthy degree. I want to know not just what’s the temperature, but how often is it running, what’s the supply and return temperatures, etc.? Let’s overengineer another project.
To start, I’ve got an Ecobee thermostat and use Home Assistant to integrate with all my devices. Home Assistant is an open-source smart-home orchestration system. It has numerous different integrations, which allow you to add almost any smart home device you can think of. I switched to after trying both Samsung SmartThings and Hubitat and finding of them not powerful.
Why?
With any thermostat added in Home Assistant, you can obviously know what is the temperature and humidity in different rooms and that’s useful, but HVAC units have a lot of different things that can be monitored.
For example, comparing the return temp (the temperature of the air going into the system) and the supply temp (air temp going back to your house) tells you how much the unit is able to increase or lower the temperature of the air.
Monitoring how long it runs per day helps me know whether it’s under sized or the setpoint is too low/high. I can even use this to know that I need to replace the filter after a certain number of hours of runtime.
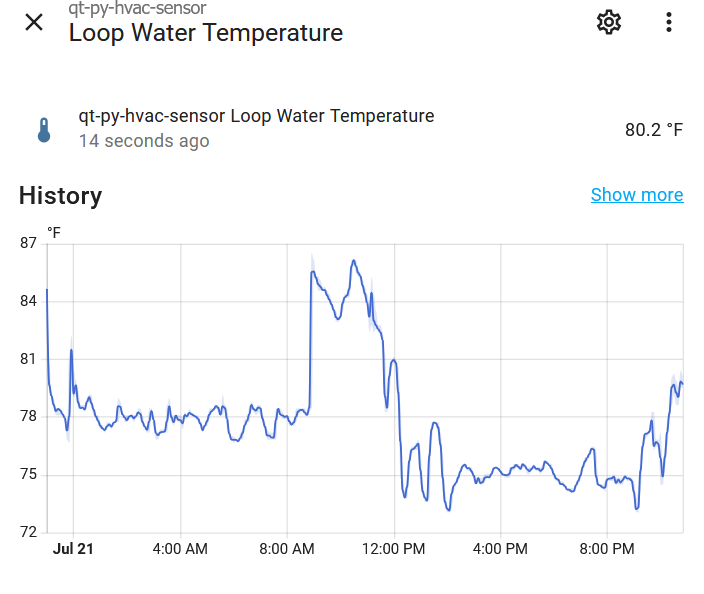
My condo has a water sourced heat pump with a central water loop. When heating, it takes heat out of the loop and heats the air. When cooling, it takes heat in the air and transfers it to the water in the loop to go to the cooling tower up top. I attached a thermocouple to the pipe to measure that loop temp since it fluctuates based on how many other people are using it.
Home Assistant
First, add the thermostat to Home Assistant if it already isn’t already there. I’m using an Ecobee. If you have a different thermostat, you should still be able to use these dashboards, but you’ll need to ensure your thermostat provides similar sensors
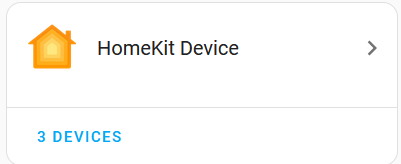
Ecobee HomeKit
If you’ve got an Ecobee, then adding it using the Apple HomeKit Device integration will use local only network connections and avoid any cloud calls.
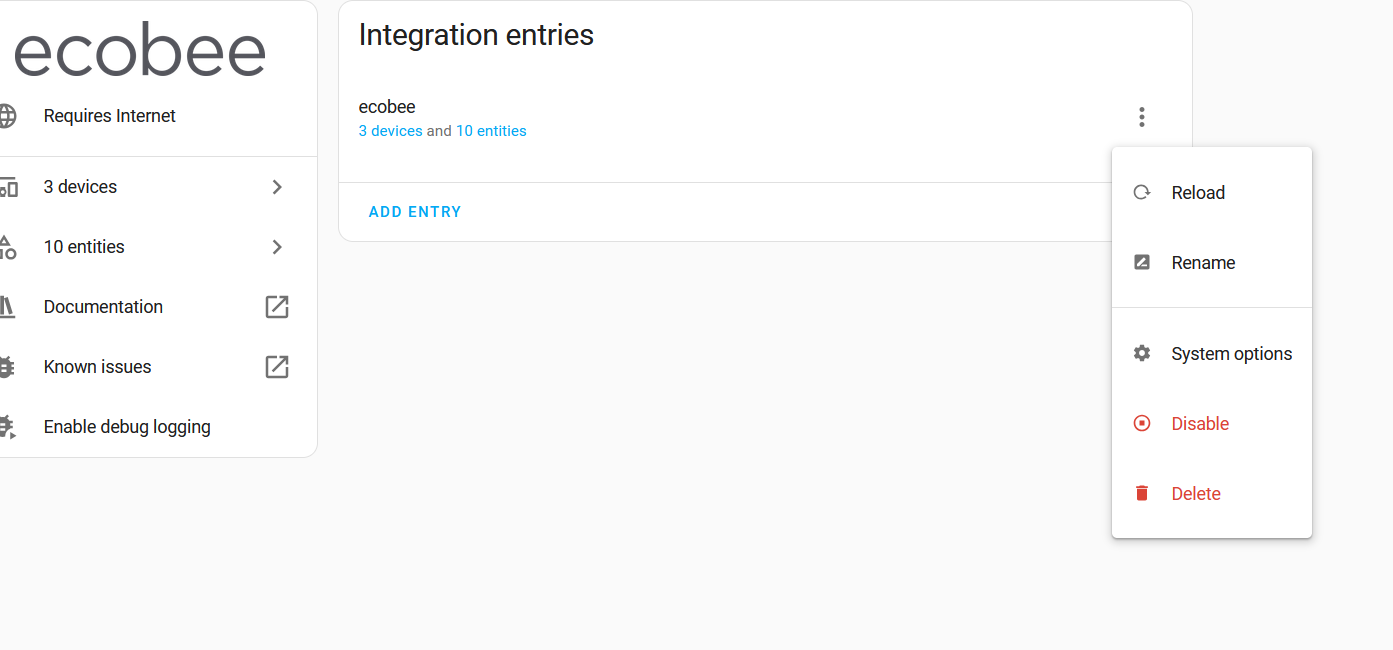
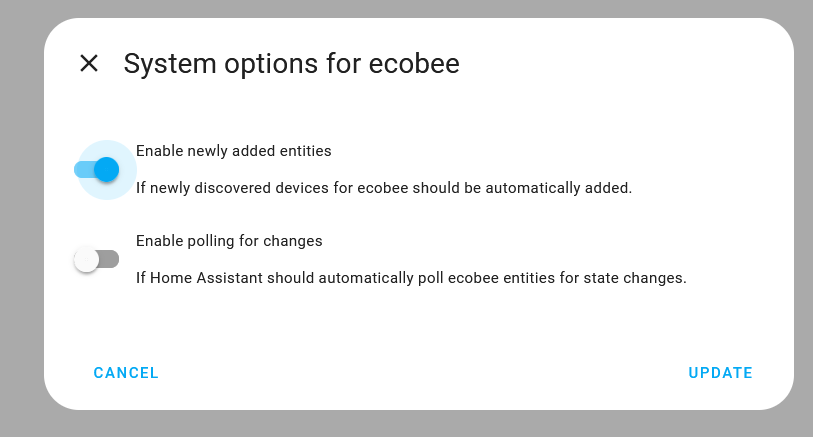
Ecobee Cloud Integration
There is also an Ecobee integration, but Ecobee stopped allowing people to sign up for the developer accounts. There’s a few features that the HomeKit integration doesn’t support like better mode switching because the HomeKit mode doesn’t set an override like the Ecobee integration does. I have both added, but disabled polling so I only make API calls when calling actions.
Basic Dashboards
Now, I’ve got some basic entities that report temperature, humidity, even motion. How you design your dashboard is up to your personal preference and the later metrics are more interesting. Don’t spend too much time here.
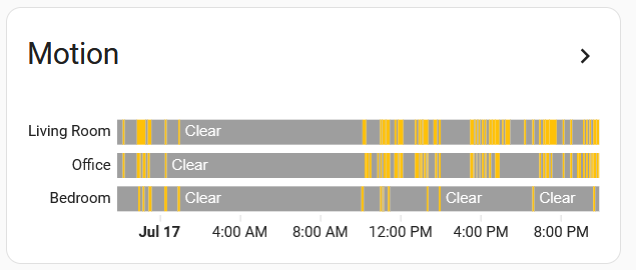
Motion
Ecobee thermostats and the smart reports report motion making them useful for motion tracking. A history graph makes it easy to see this across different rooms:
 And the YAML:
| |
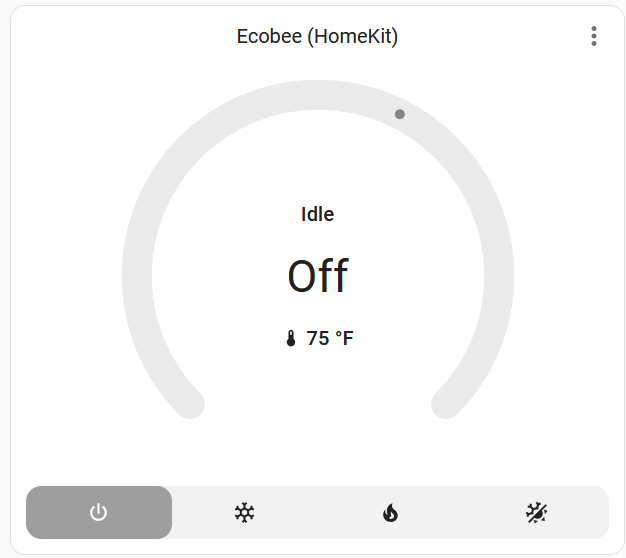
Thermostat Control
What dashboard isn’t complete without actually allowing us to edit the set points.
| |
Calculating Runtime
Let’s get into the more complex metrics–runtime. Tracking runtime is a useful metric because it gives you some interesting insights:
- Runtime - The more your A/C runs, the more wear it has and the more likely it’ll break down. You could use this to decide to schedule a yearly maintenance/inspection sooner or later depending on how much you use it.
- Duty Cycle is the percentage of time that your unit is actually running. 100% means it’s running continuously. It could mean different things including: it’s a very hot/cold day, poor house insulation, improper setpoints, undersized HVAC units, or even a window left open.
- Runtime since the filter was changed. As filters get dirtier, it gets harder to pull air through it making your system work harder. Tracking this gives you a metric to know when to replace your filter.
State Tracking
First, we’ll need to create a few template sensors to break out the states. You can either put this into your Home Assistant’s /config/configuration.yaml file, or create these using the UI in Settings > Devices & services > Helpers > Create Helper.
| |
If you’re using YAML, save the file, then reload your entities in Developer tools >YAML tab > Reload “Template Entities” if it’s available, or restart HA if it’s not. You should now be able to see those new entities (Search in the top right if you don’t know where they are). If they’re marked as unavailable, then check to make sure your thermostat entity is climate.home. If it’s something else, like climate.my_ecobee, then update the templates above.
Calculating runtimes
Next, it’s time to use those templates to actually track the runtime. Home Assistants history stats integration is perfect for this.
These entities will start counting up whenever the fan state or run state is in the defined mode.
| |
Filter Change Tracking
The sensor.hvac_runtime_today resets every day, so if we want to track total runtime since a filter was replaced weeks or months ago, we need to keep summing it up.. The utility meter integration can do exactly that. I also store the filter change time just to make it easier.
In /config/configuration.yaml, create the following entities and reload.
| |
Dashboarding
Now, I’ve got a few different entities, here’s some sample dashboards. If you don’t already have it, I use the template-entity-row dashboard card row to help with some more complicated dashboards.
And the YAML:
| |
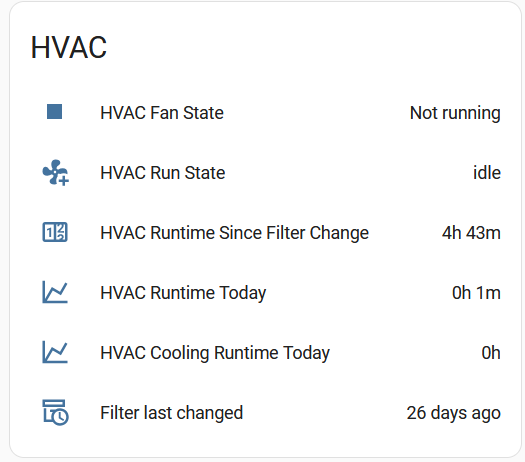
Entity Reference
Let’s recap the entities we have created.
- input_datetime.hvac_filter_change_date - Tracks the last time the filter has been changed
- sensor.hvac_runtime_since_filter_change - Tracks how many minutes the unit has operated since changing the filter
- binary_sensor.hvac_fan_state - Tracks whether the fan is running
- sensor.hvac_run_state - Tracks what the thermostat is calling for (heating, cooling, fan, etc.)
- sensor.hvac_runtime_today - Tracks how much the unit has run today
- sensor.hvac_cooling_runtime_today - Tracks how much cooling the unit has done today
- sensor.hvac_heating_runtime_today - Tracks how much heating the unit has done today
Sensing Temperatures
In this post, I showed some basic dashboarding for a thermostat in Home Assistant and also showed some advanced monitoring that used Home Assistant to track running times and temperatures for your HVAC unit which gives useful insights for maintenance and efficiency. The new metrics are easy to create and add to dashboards.
Going a step further, I created my own embedded device to measure air temperatures. Next up, I wanted to add some extra sensors to my HVAC unit itself. My system is self-contained inside my condo and I have access to the different pipes and vents, but a split unit installed outside may not be as accessible.
To handle this, I built my own prototype circuit. I started with an ESP32 running ESPHome. You can use any type of ESP32, but I had a few of the Adafruit Qt Py ESP32s lying around. ESPHome is a firmware development system that abstracts out writing C++ and you define sensors in YAML.
For my sensors, I opted for these thermocouples because they’re easy connect to the board and place them in specific areas. Thermocouples work by measuring change in resistance as the temperature changes. They don’t have any electronics themselves and require a separate component, an amplifier to convert that into something that the ESP32 can read.
Adafruit sells several different types of amplifiers including the MCP9600, MCP9601, MAX31856, and the MAX31850K, and a few others.
The MCP9601 is nice because it comes with a stemma connector, which is an Adafruit standard connector that allows for you to connect i2c devices without soldering, but the issue with i2c is that the address is hard-coded to a single address. Multiple amplifiers will conflict unless you change the address by adding a small amount of solder to the address change pads below.
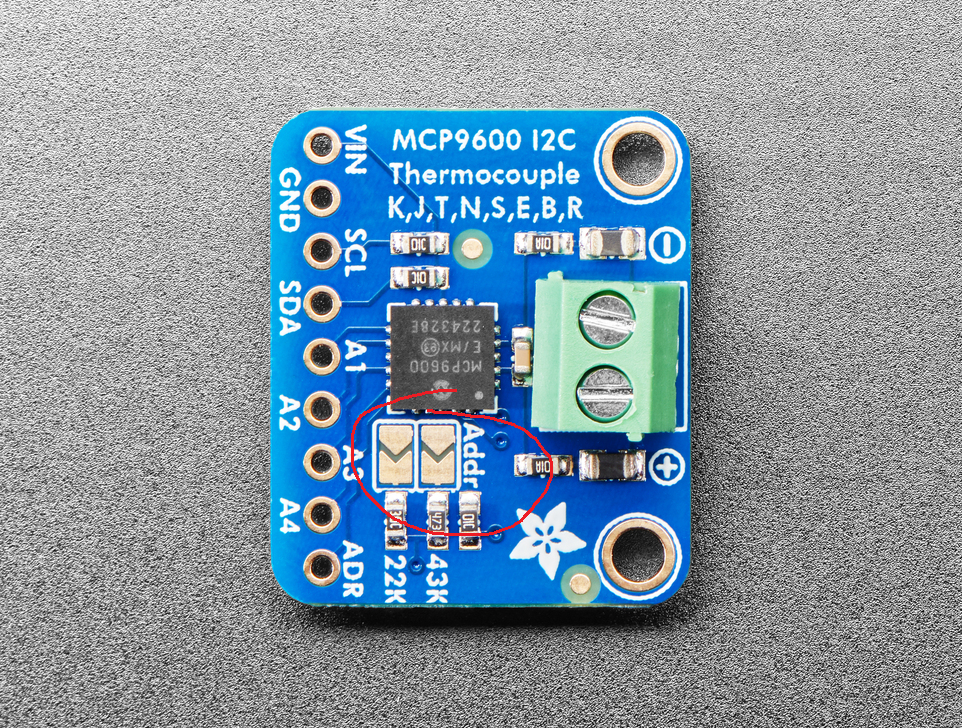
The MAX variants are less accurate (0.25°C resolution) compared to the MCP960x at 0.0625°C resolution.
My first revision opted for the MCP9600 and I soldered the pins to the circuit and put them into a breadboard.
One thermocouple was inserted as close as possible to the supply duct that supplies the rest of the condo with heated or cooled air. The 5 meter thermocouple makes it easy to run the temp sensor right into it. The thermocouple wire can be seen in the picture below along the right side of the unit.

I also secured one to the water loop supplying hot and chilled water to my unit. During heating modes, it allows me to see how much heat I could put into the air. During cooling modes, the hotter it is, the harder my unit will work to put heat into it. This also gives me some data I can use to work with my building’s engineer to optimize the systme.
ESPHome Config
Here’s the configuration I used. If you use a different ESP32 board, some of this configuration will differ.
| |
Future Work
In my next iteration, I plan to integrate a 24v DC regulator to pull power directly from the HVAC unit instead of having to run an ugly DC wire to a nearby closet. I want to add a few more thermocouple amplifiers to measure other areas, or even measure the pressure drop across the fan like this project, esphome-pressure demonstrates. I also want to make it a custom PCB so the board is a lot cleaner.
Conclusion
In this post, I showed some basic dashboarding for a thermostat in Home Assistant and also showed some advanced monitoring that used Home Assistant to track running times and temperatures for your HVAC unit which gives useful insights for maintenance and efficiency. The new metrics are easy to create and add to dashboards.
Going a step further, I created my own embedded device to measure air temperatures.
