Ever wondered where the energy is going in your house and know exactly when and which circuit is consuming the most electricity? How much is your air conditioning unit costing you each month in kWh?
Home energy monitors are devices that you can use to monitor how much energy you’re using at any given point in time. You can use them to figure out how much each device or circuit you’re using overnight vs the day. If you have differing energy costs at the day vs night, you can use them to ensure devices run at lower cost time of day, you can use it to as part of a smart home automation to automatically notify you when your washing machine is done, or even identify when you need to upgrade a circuit because your server room is pulling too much.
In this post, I’m going to walk through the different products I considered for a project at a friend’s house, pros and cons, and how to order the appropriate equipment.
Hardware Options
Several different companies make solutions that monitor your energy usage. All of the ones I considered make use of CTs (current transformers) that clamp around the wire to sense the current flowing across that wire.
Sense provides two CTs that you attach to the two main lines into your circuit box. It does not monitor each circuit independently, but instead uses machine learning to try to identify what devices are running based on their signature.
While installation is simpler with only two CTs, it’s not able to measure load of each circuit and say that you’re about to exceed a circuit limit. Additionally, using ML to identify appliances is not guaranteed to actually work. It may not work and some reviews have attested that it can’t detect all appliances. Ultimately, using ML to detect device types adds risk to this project that it wouldn’t provide useful data compared to circuit level monitoring.

Sense is cloud-based where all energy usage is sent to the cloud. You can view this on the web or use an API to pull data back into whatever software you want to use.
Instead of using ML, Curb allows you to install CTs on individual circuits which allows you to break down the energy usage accurately between each circuit and show the total across all circuits. Compared to Sense, this can have the advantage of not trying to use ML to identify the type of device through signature and instead directly measure usage of that circuit. Although, it’s possible that if two or more devices are on the same circuit, ML-based sensing could independently detect both devices.

Curb is also cloud-based like Sense and requires an API to consume energy usage data into your own system.
Curb communicates with your network over power lines. It communicates with the HomePlug receiver over a single circuit, which then uses Ethernet to connect to the internet. This avoids the Wi-Fi requirement, but power line communications can be noisy when certain devices are on the same one.

The GEM is similar to the Curb since it allows per-circuit sensing, but the primary advantage is that it provides a purely local data collection and does not send data to the cloud. It can directly connected to HomeAssistant using the GEM integration.
Summary
| Sense | Curb | GreenEye Monitor | |
| Data access | Cloud | Cloud | Local |
| Per-circuit monitoring | No | Yes | Yes |
| Per-device monitoring* (dependent on ability to detect) | Yes | No | No |
| Network Connectivity | Wi-Fi | Power line + Ethernet | Ethernet or Wi-Fi |
| Subjective user-friendliness | Easiest | Easier | Harder |
| HomeAssistant Integration | Cloud Pull | No native support | Local Push |
Each option had their own advantages and disadvantages, but I landed on the GreenEye Monitor for its local-only data access, support for individual circuit monitoring, and Ethernet. Avoiding cloud meant that the manufacturer could never stop offering, modify, or even charge for the API; this isn’t new in the world of smart homes when Wink started charging a monthly fee to use their hub.
Purchasing the Hardware
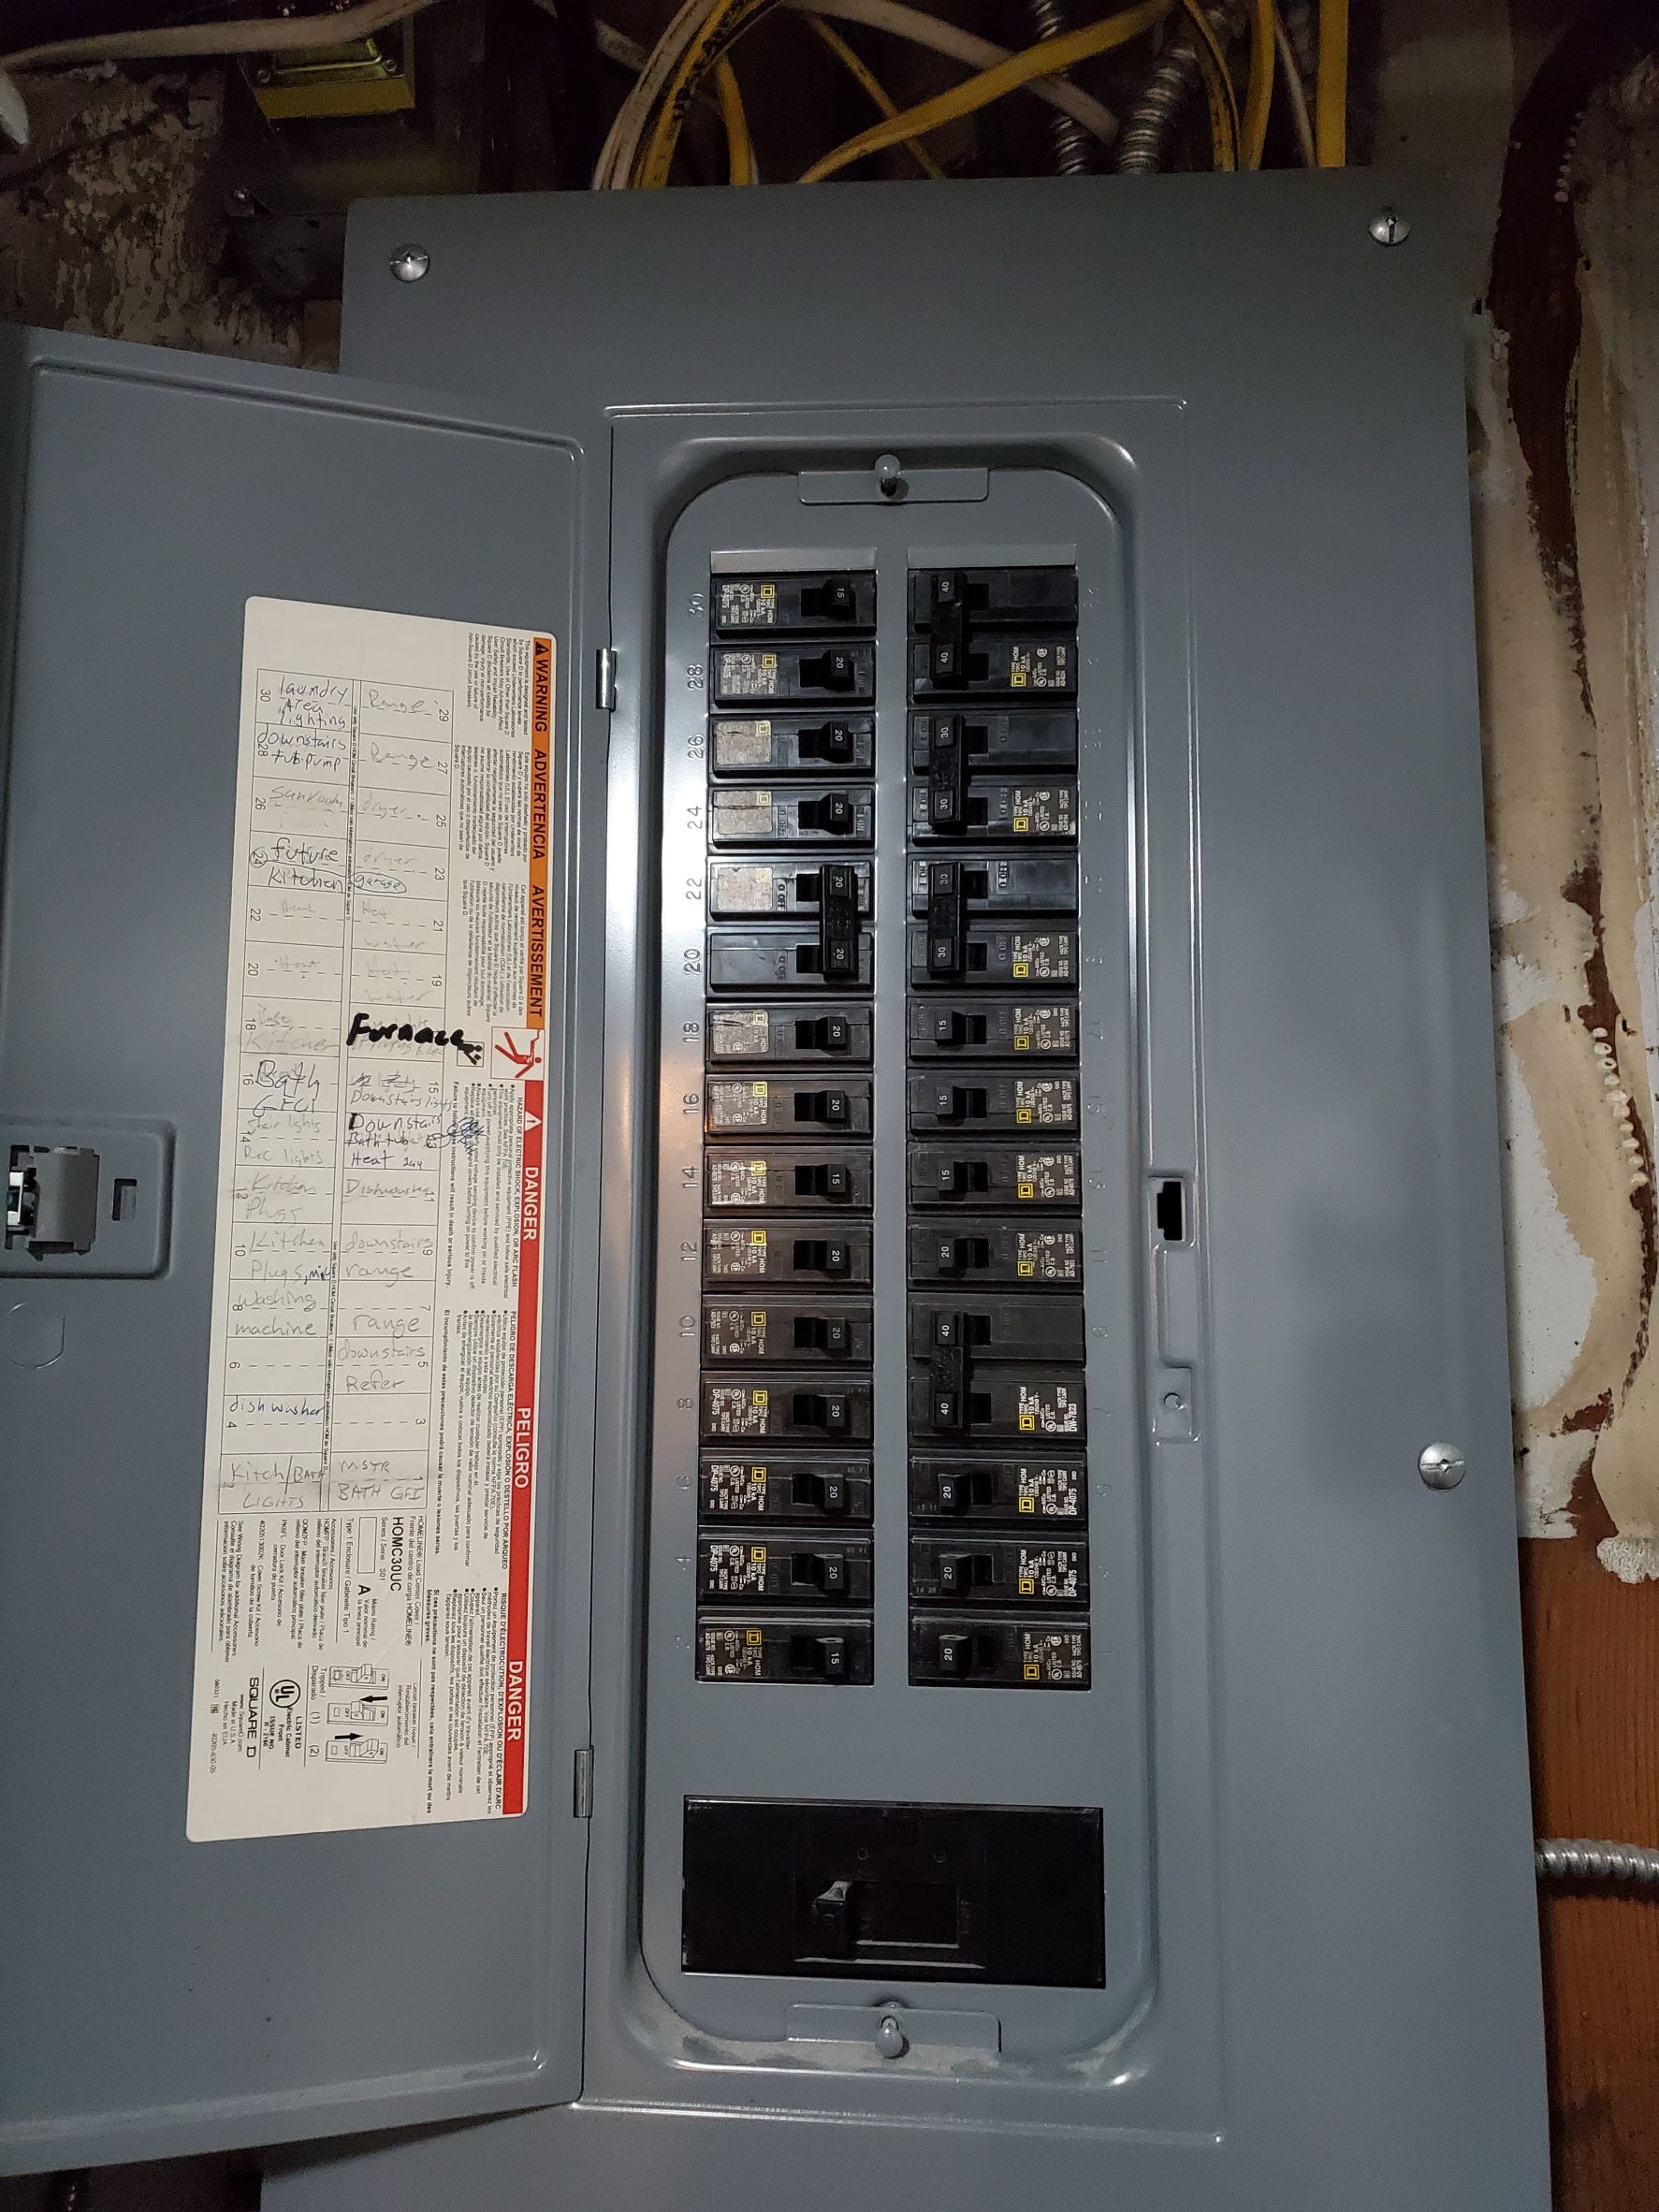
This is the circuit breaker box that will be monitored. This work is being done as part of an electrical rewire, so at the same time the box will be upgraded and replaced, but we’ll use this as the baseline to help order the correct equipment.
Ordering the CTs and correct packages from Brultech was challenging since they have multiple packages and different style of CTs.
Count the number of circuits that exist right now:
- 2 200amps - The breaker is labeled 200amp, thus each phase is 200amp
- 4 40amps
- 4 30amps
- 16 20amps
- 6 15amps
- Total: 32 circuits
CTs can be either donut style or split style. A split style CT can be clipped onto a cable without the cable being removed from the breaker, but a donut style requires you to unplug the cable from the breaker, run it through the circle, then plug it back in. The donuts are smaller than the splits, so to help reduce mess in the breaker box, I wanted to order as many donut CTs as possible.
Since we’re upgrading the panel at the same time and didn’t have clear guidance from the electrician, we ended up ordering some extra CTs and arrived at the following set of CTs to accommodate expansion:
- 2 200amps
- 4 100amps
- 6 40 amps
- 5 30 amps
- 25 20amps
- 6 15 amps
- Total: 48 CTs
We didn’t order any DashBoxes because I was going to integrate the monitors directly into HomeAssistant and didn’t need any UIs on-top of the raw TCP stream. Thus I started with the GreenEye Monitor Package which gave two CT packages along with the box. Each package provides a different set of CTs, but the following were the ones I was interested in:
- Package B: 2 100amps, 6 donut 40s
- Package E: 5 split 60amps
- Package F: 7 split 30amps
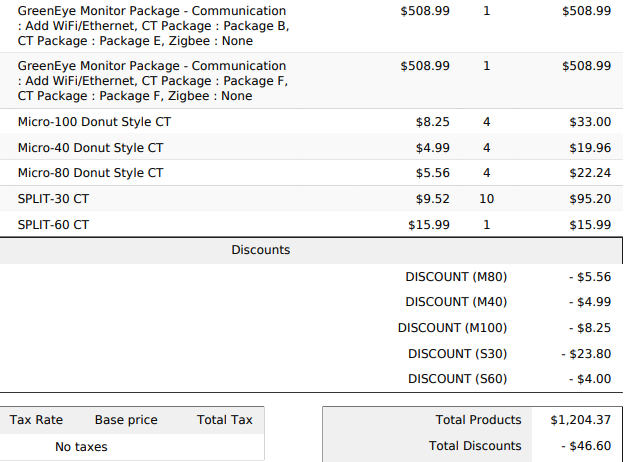
We ordered two monitor packages with three package Fs, one package E, and one Package B along with some individual CTs and got the following CTs:
Note that we separately ordered the 200amp CTs.
Installation
The installation guide for the GEM system monitor can be found on the Brultech website here (GEM Hardware Installation Manual GEM-MAN). Follow the directions to install the CTs correctly.

This is a high-level diagram showing how the different panels are electrically connected to each other.
As part of the parallel electric rewire project, we ended up with three total electric panels in the house: a main panel, a sub panel for overflow located in the server room, and a sub panel located in the garage. For the first project phase, we only got two GEM monitors instead of three. One GEM monitor was for the main panel and one for the house sub panel.
Even though we didn’t have a monitor specifically in the garage sub panel, we’d still be able to monitor total garage utilization from the main panel since a CT was attached to the breaker wire heading to the garage. Since we have a monitor for the house sub panel, we did not install CTs in the main panel for this circuit since it would be covered using CTs installed in the sub panel.
Important Notes for Installation
Safety Warning: Always turn off the circuit before installing a CT and make sure it’s attached to the GEM monitor or the wire leads are twisted together before turning on the circuit. CTs can produce energy flow in the wires and damage the CT. Some CTs from Brultech do include a “burden resistor” (e.g. all splits) where this isn’t a concern, but not all the mini CTs have it. We encountered an issue where one CT started buzzing because the leads were not twisted together.
If possible, have an electric outlet installed near the GEM that connects to the same panel. This will make it easier to install because there are two separate wall adapters, one for power and one to measure the voltage.
When installing each CT, make sure to label each wire with a number and note down: breaker number, breaker label, and type of CT (e.g. split-30, donut-40, etc.). The correct CT type needs to be programmed into the GEM monitor software. Without it, you’ll get incorrect current measurements.
Split phase (e.g. your mains or any circuits with two breakers like for clothes dryers) require you to install the CTs into the same channel on the GEM, but depending on whether you have a type-A or type-B you need to wire them differently.
Two types of current transformers are compatible with the GEM, Types A and B.
TYPE A: SPLIT-60, SPLIT-100, SPLIT-200, SPLIT-400
TYPE B: Micro-40, Micro-80, Micro-100, SPLIT-170From the GEM installation manual
Some install pictures
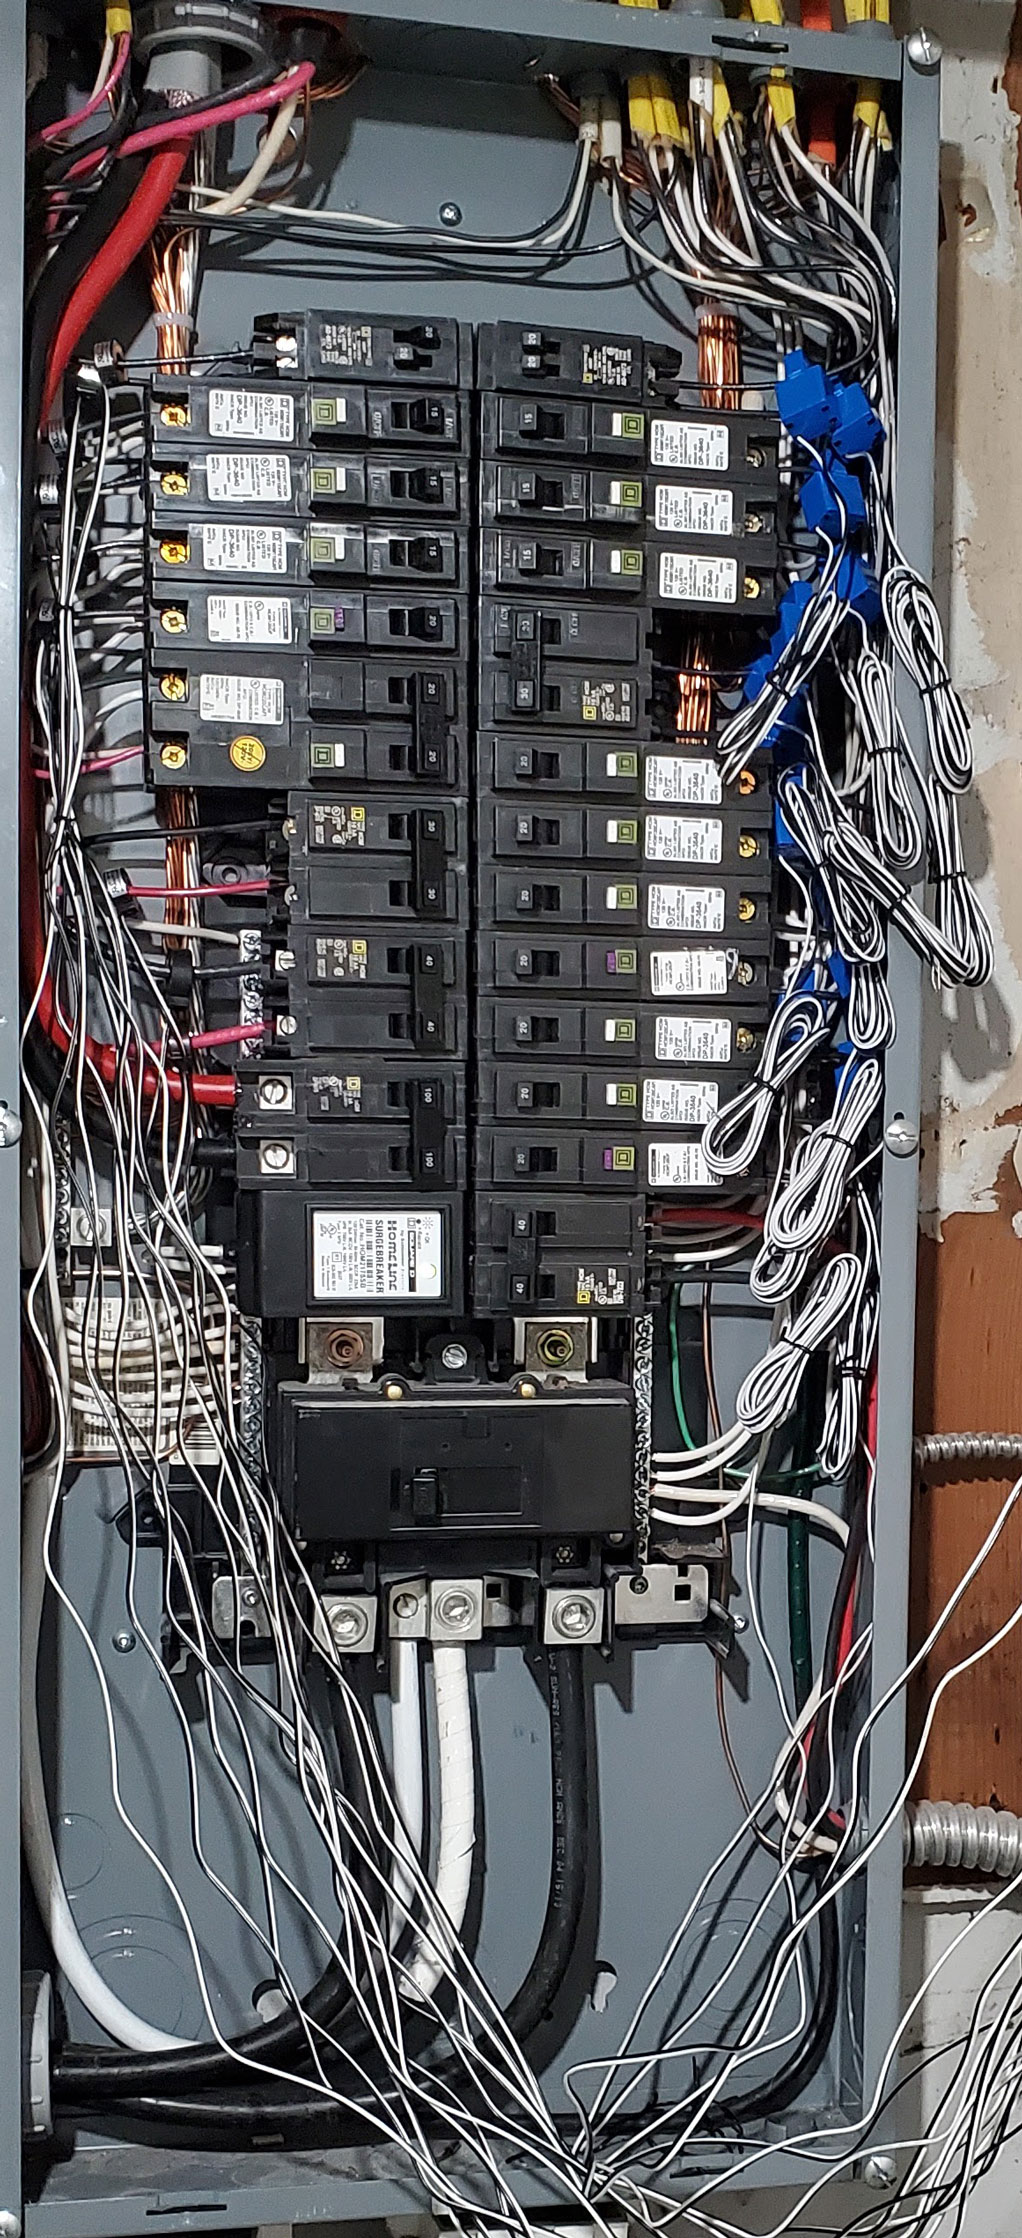
Here’s a picture of the circuit breaker box with the CTs installed. Note on the left, we’re using donuts, but on the right, it’s the split CTs. The donut CTs are noticeably more compact. If you have the opportunity to use them, they’ll keep your box a lot cleaner.
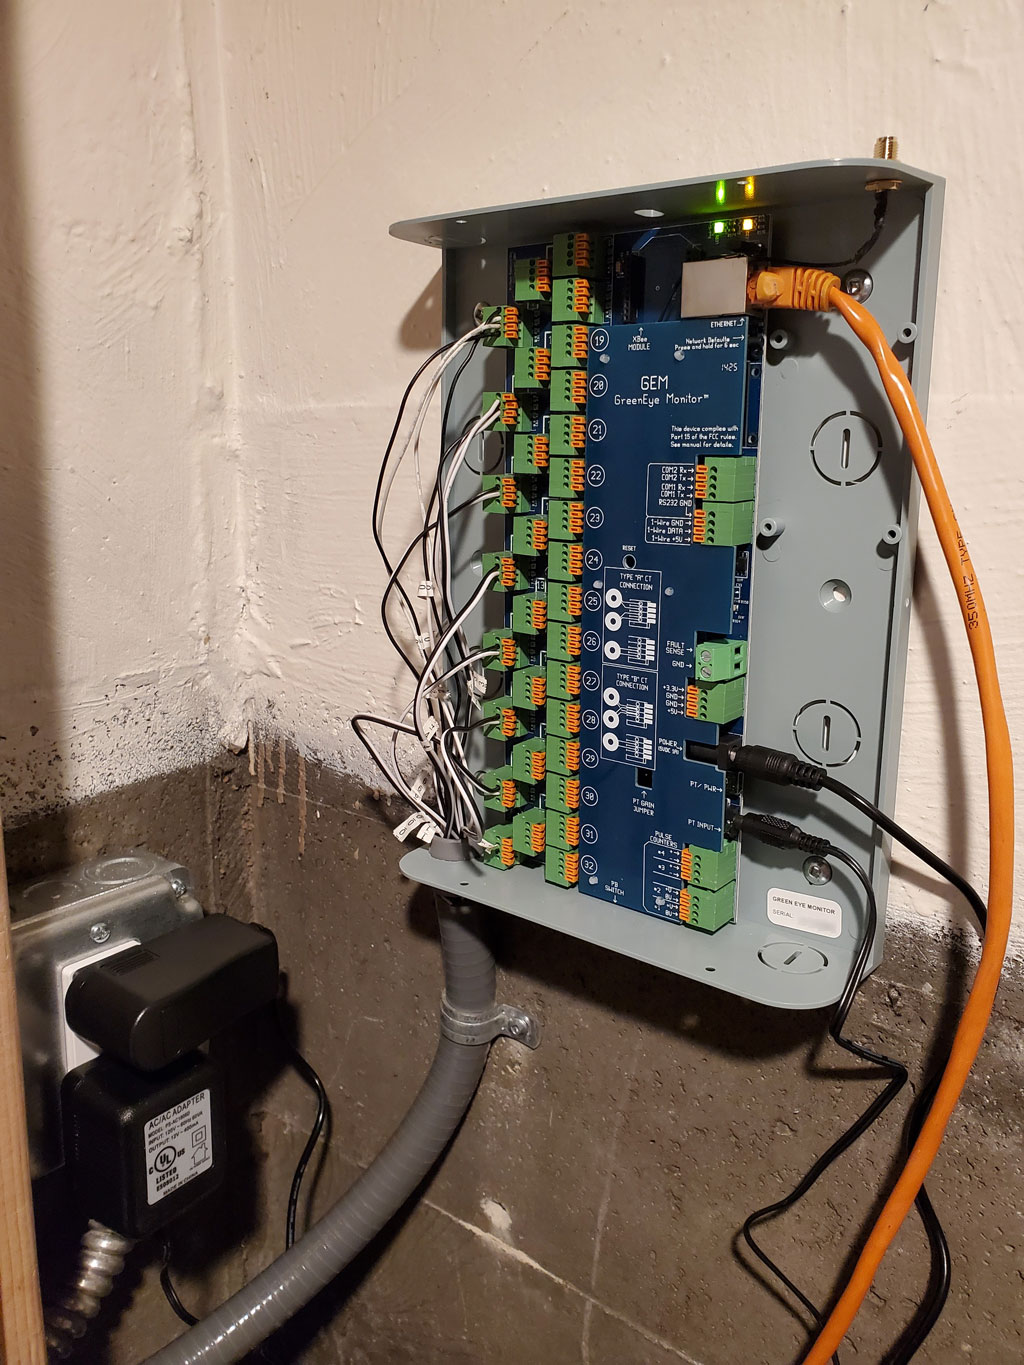
Here’s a picture of one of the GEMs with the CTs connected. I’ve temporarily run an Ethernet cable directly to the port, but eventually I’ll install it more cleanly.
Now everything should be functional. In the next post of this series, I’ll walk through the software configuration.
